Razorpay
Connect Razorpay to Faurya with API credentials, a Faurya webhook secret, and Razorpay webhook events for revenue attribution.
Attribute revenue with Razorpay
Use this guide to connect Razorpay webhooks to Faurya. The setup has three parts:
- Pass Faurya attribution IDs into Razorpay checkout notes.
- Save your Razorpay API credentials in Faurya.
- Create a Razorpay webhook with the Faurya endpoint, Faurya webhook secret, and supported events.
After the webhook is added and confirmed, Faurya can verify Razorpay events and attribute successful payments back to the original visitor and session.
Use credentials from the same Razorpay mode where you create the webhook. Do not mix Test Mode keys with Live Mode webhooks.
What Faurya needs from Razorpay
Faurya uses these Razorpay values:
- Razorpay Key ID
- Razorpay Key Secret
- Faurya-generated Razorpay Webhook Secret
The Key ID and Key Secret are saved in Faurya first. Faurya then generates a webhook secret that you must paste into Razorpay while creating the webhook.
Pass Faurya attribution IDs to Razorpay checkout
Before you create a Razorpay order, read the Faurya attribution IDs from cookies and pass them into Razorpay notes. This lets Faurya connect the final payment webhook back to the visitor and session that started checkout.
Use these cookie values:
faurya_visitor_idfaurya_session_id
Example with a Next.js server route:
import Razorpay from "razorpay";
import { cookies } from "next/headers";

const razorpay = new Razorpay({
  key_id: process.env.RAZORPAY_KEY_ID!,
  key_secret: process.env.RAZORPAY_KEY_SECRET!,
});

export async function POST() {
  const cookieStore = await cookies();
  const fauryaVisitorId = cookieStore.get("faurya_visitor_id")?.value;
  const fauryaSessionId = cookieStore.get("faurya_session_id")?.value;

  const order = await razorpay.orders.create({
    amount: 99900,
    currency: "INR",
    receipt: `receipt_${Date.now()}`,
    notes: {
      faurya_visitor_id: fauryaVisitorId,
      faurya_session_id: fauryaSessionId,
    },
  });

  return Response.json(order);
}
If you use subscriptions, invoices, payment links, or a custom checkout flow,
pass the same faurya_visitor_id and faurya_session_id values into the
Razorpay notes field for the object that will appear in webhook payloads.
Step 1: Save Razorpay API credentials in Faurya
In Razorpay, open your dashboard and go to:
- Account & Settings
- API Keys
- Generate Key or copy an existing active key
Copy the Key ID as your Razorpay Key ID.
Copy the Key Secret as your Razorpay Key Secret.
Open your Faurya dashboard and go to your site's Revenue settings. Select Razorpay.
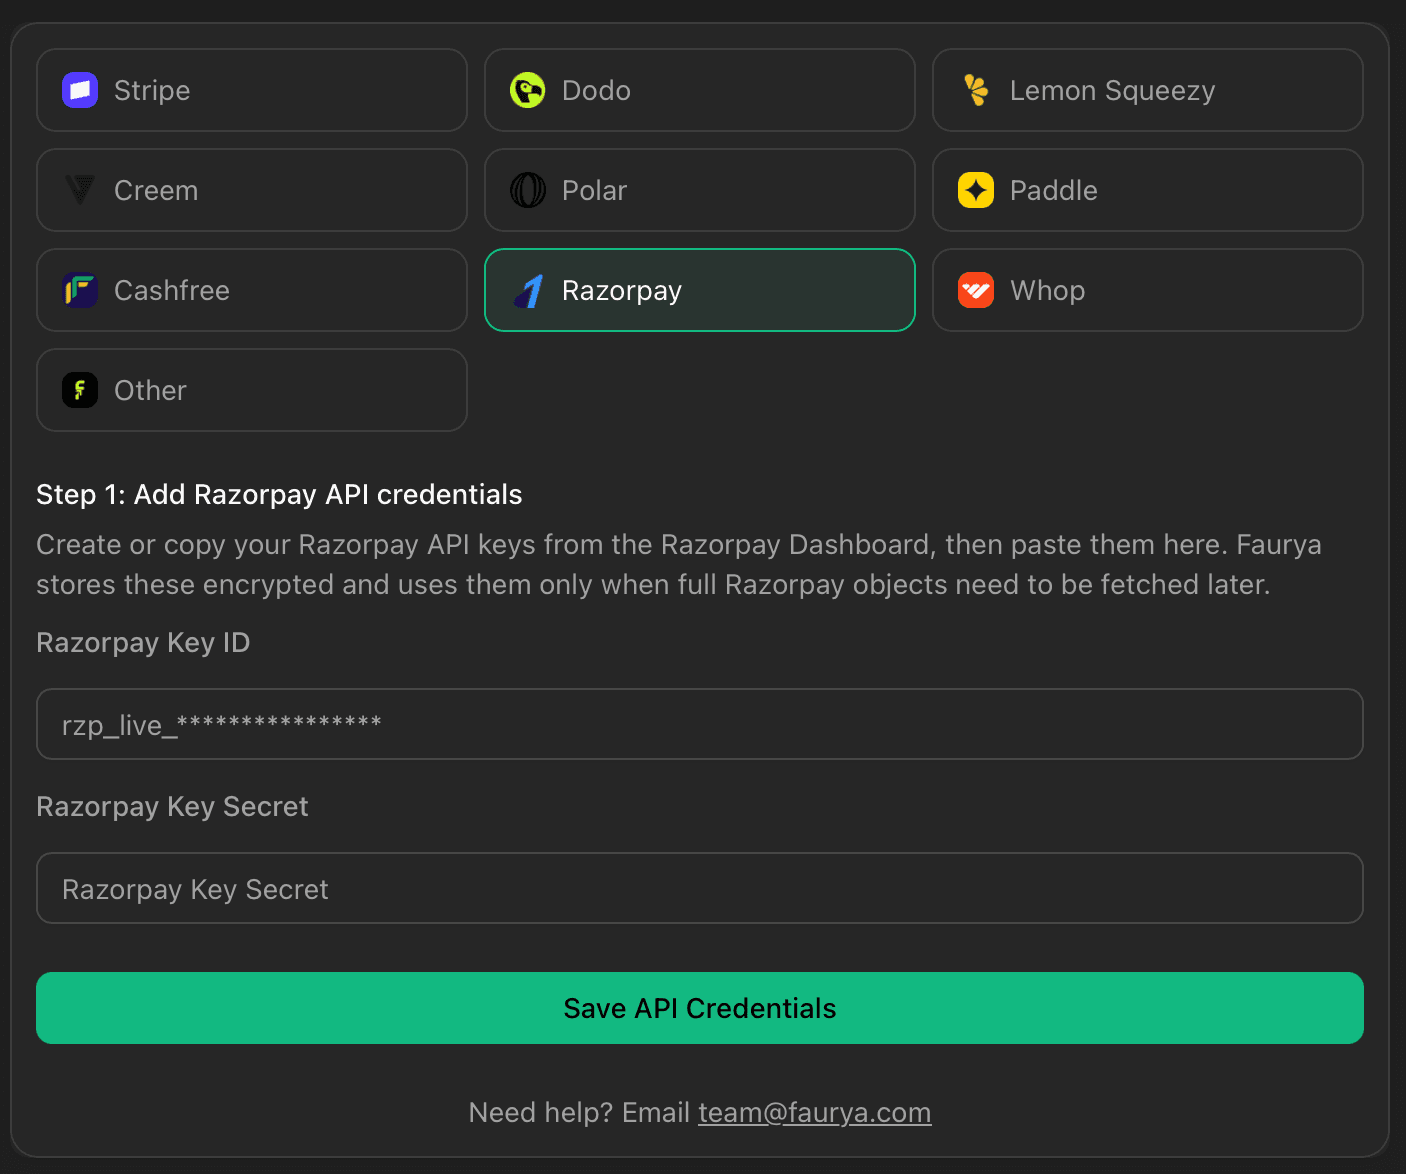
Enter:
Razorpay Key IDRazorpay Key Secret
Then click Save API Credentials.
Faurya stores these credentials encrypted. Razorpay is marked connected only after you add the generated webhook secret in Razorpay and confirm the webhook was created.
Step 2: Create the Razorpay webhook
After saving your API credentials, Faurya shows Step 2 with your Razorpay webhook URL and a Faurya-generated webhook secret.
If your Razorpay API credentials were already saved earlier, Faurya will not ask for the Key ID or Key Secret again. Faurya shows the webhook URL and webhook secret directly in Step 2.
The webhook URL looks like this:
https://app.faurya.com/api/v1/webhooks/payment/razorpay/siteIdCopy both values from Faurya:
- Webhook URL
- Razorpay Webhook Secret

Copy the webhook secret now. Faurya encrypts and saves it only after you click I Added the Webhook in Razorpay.
In Razorpay, go to:
- Account & Settings
- Webhooks
- Add New Webhook
In the webhook form:
- Paste the Faurya webhook URL into Webhook URL.
- Paste the Faurya-generated secret into Secret.
- Select all events in Razorpay.
- Set the webhook to active.

Click Create Webhook or Save.
Step 3: Confirm the webhook in Faurya
Go back to Faurya and click I Added the Webhook in Razorpay.
Faurya encrypts and saves the webhook secret, then enables Razorpay for the selected site.
When the connection is ready, the Razorpay card shows:
Razorpay connected: rzp_********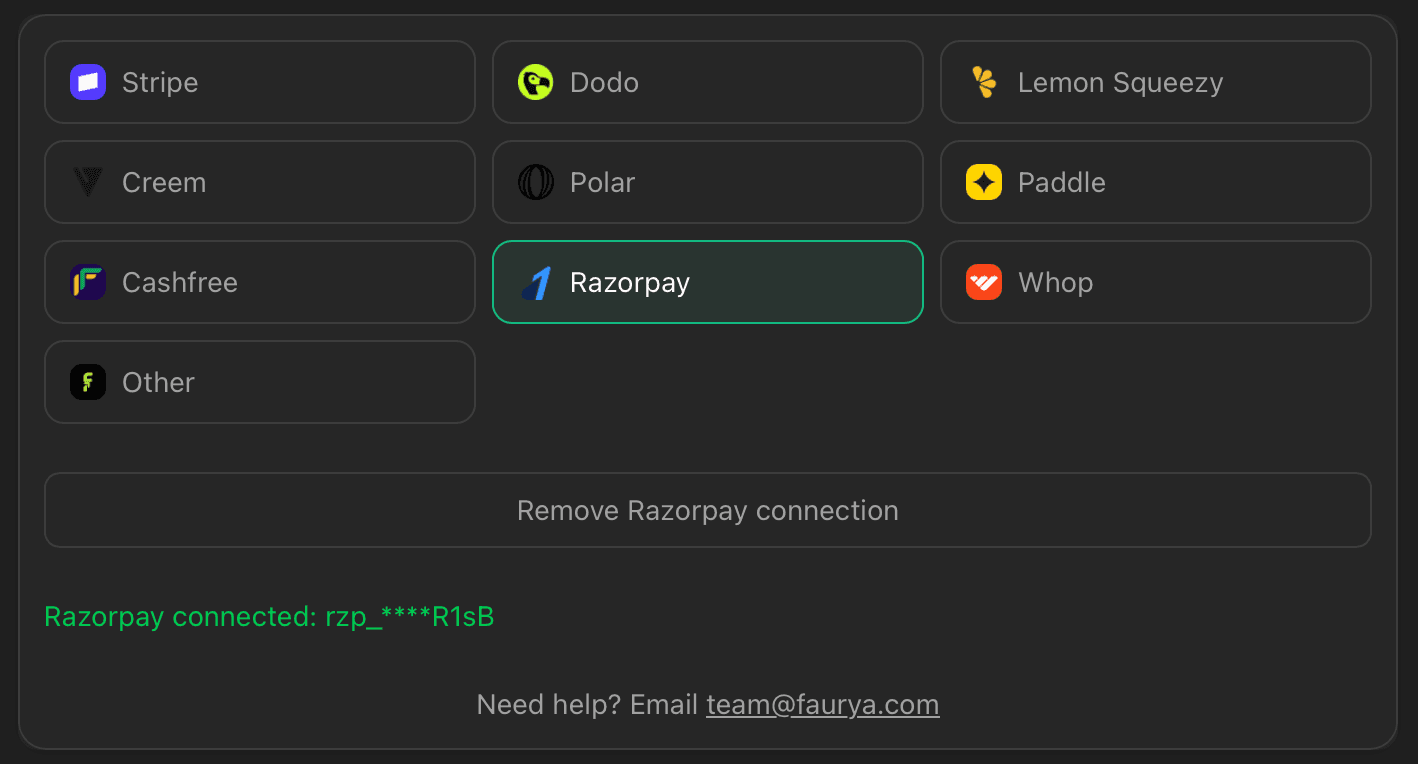
At this point, Razorpay revenue events can be verified and processed by Faurya.
How Razorpay attribution works
When Razorpay sends a webhook to Faurya:
- Faurya reads the raw webhook body.
- Faurya verifies
x-razorpay-signatureusing the webhook secret saved for your site. - Faurya parses the webhook only after verification succeeds.
- Faurya checks whether the webhook was already processed.
- Faurya records successful
payment.captured,subscription.charged, andorder.paidevents as payment revenue. - Faurya uses
notes.faurya_visitor_idandnotes.faurya_session_idto connect revenue to the original visitor and session.
Unsupported but valid Razorpay events are acknowledged so Razorpay does not keep retrying them.
Troubleshooting
Razorpay remains disconnected in Faurya
- Confirm you saved Razorpay Key ID and Key Secret in Faurya first.
- Confirm you clicked I Added the Webhook in Razorpay after creating the webhook.
- Confirm the webhook URL includes the correct Faurya site ID.
- Confirm the webhook is active in Razorpay.
Webhook signature fails
- Confirm the Faurya-generated webhook secret was pasted into Razorpay exactly.
- Confirm Test Mode webhooks use Test Mode keys and Live Mode webhooks use Live Mode keys.
- Generate fresh credentials in Faurya, create a new Razorpay webhook, and paste the new secret if the original secret was lost.
Revenue is not appearing
- Confirm you selected
payment.captured,subscription.charged, ororder.paid. - Confirm Razorpay shows successful webhook deliveries.
- Confirm the webhook payload includes an amount and a payment, order, or subscription ID.
- Confirm your checkout passes
faurya_visitor_idandfaurya_session_idin Razorpaynotes.
Duplicate revenue appears
Faurya deduplicates Razorpay webhooks using Razorpay event IDs and payment/order/subscription identifiers. If you also send revenue manually through the Faurya Payments API, avoid recording the same payment twice.